Campus Connection Assistance
North Dakota University System (NDUS) Help Desk
1-866-457-6387
or
Submit a Help Desk Ticket.
Delegated Access to Campus Connection
Delegated access allows you to grant viewable access to certain pages within Campus Connection to a third-party or proxy. You can grant a proxy access to:
- pay online
and/or view:
- financial aid
- student finance (account balance, payment history, and 1098t)
- contact information (addresses, email, phone number)
- classes
- course history
- grades
- tasks (to-do lists, holds, etc.)
Directions for students to delegate access to a proxy
Directions for the proxy to access Campus Connection
Additional Instructions
- If you haven’t already done so, Claim your new System ID.
- Log in to your NDUS Account (User ID = firstname.lastname format).
- Click Change Password.
- Enter and confirm your new password.
- The password must contain between 8 and 16 characters from three of the following
four categories:
- English uppercase characters (A through Z)
- English lowercase characters (a through z)
- Numbers (0 through 9)
- Non-alphanumeric characters ` ~ ! @ # $ % ^ * ( ) _ + – = { } | [ ] \ : ; ? , . /
- NO spaces are allowed.
- Passwords cannot contain your name or username.
- The password must contain between 8 and 16 characters from three of the following
four categories:
- Click Change Password.
CHANGING YOUR AUTHENTICATION QUESTIONS AND ANSWERS
- If you haven’t already done so, Claim your new System ID.
- Log in to your NDUS Account (User ID = firstname.lastname format).
- Click Change My Authentication Questions and Answers.
- Provide answers to at least three of the authentication questions.
- Click Save.
For password questions and help, contact the North Dakota University System (NDUS) Help Desk at 1-866-457-6387 or http://helpdesk.ndus.edu/.
Note: Dropping a class may have an impact on your financial aid. Before dropping a class, please contact the Office of Financial Aid to see if the change in course credits will affect your financial aid award. Also, see the Dropping vs. Withdrawing page for information on refunds of tuition and fees.
To update your emergency contact information in Campus Connection:
- Log in to Campus Connection.
- In the left navigation menu, click Emergency Notification Update.
- Enter the phone number you can be reached most quickly at in an emergency.
- Note: Students can only enter one contact number.
- Choose the campus(es) that you would like to receive notifications from.
- Click Submit Changes.
You will receive a confirmation page indicating your changes have been saved.
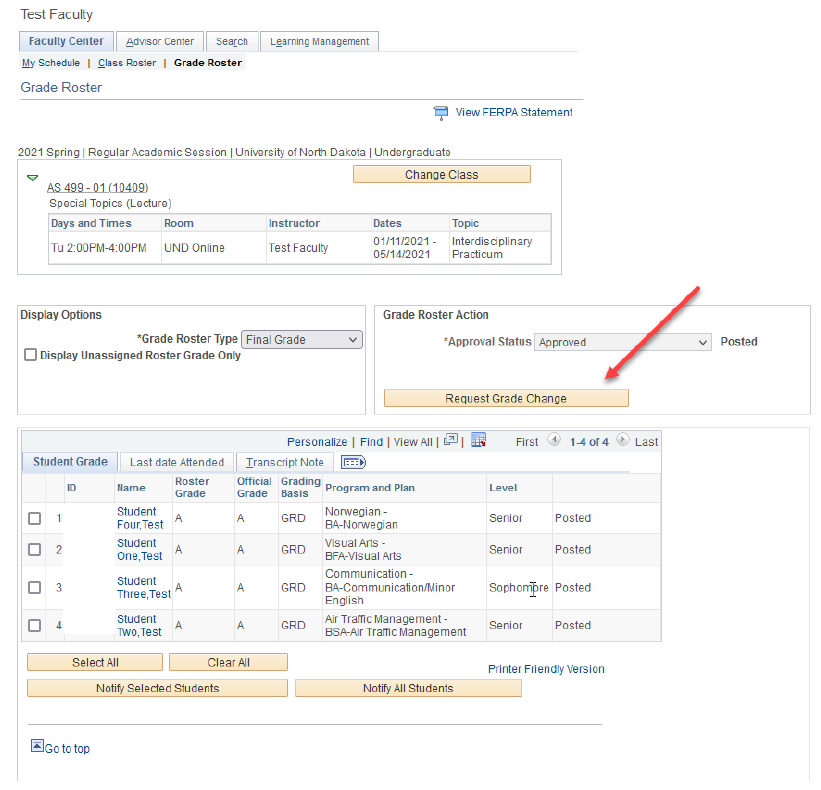
Navigation: Faculty/Advisor Homepage > Faculty Center > Grade Roster
All faculty will see the ‘Request Grade Change’ button AFTER grades are posted.

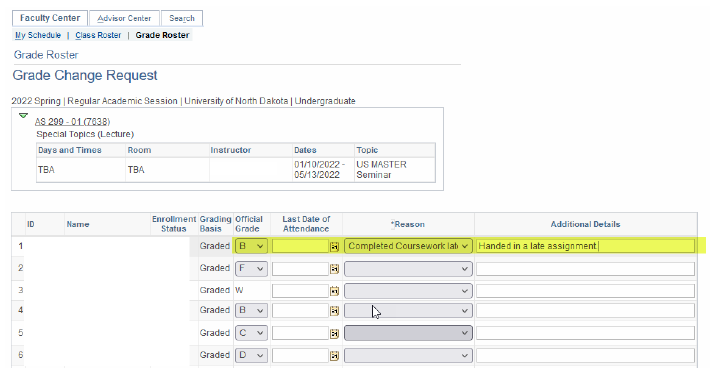
The ‘Reason’ field is always mandatory.

After clicking the ‘Submit’ button on the bottom of the page, the status will show ‘Success’ , the official grade was updated. Academic Records and Financial Aid will receive an email upon ‘Success’ of your submission.
How to enter mid-term grades (Faculty)
Click here for instructions on entering mid-term grades
How to view mid-term grades for advisees (Faculty/Staff)
To view mid-term grades for your advisees follow these instructions:
Log in to Campus Connection
- Click 'Self Service' > 'Advisor Center' > 'My Advisees'
- Locate the student you want to check grades for
- Click the 'View Student Details' link
- Click the 'other academic...' drop down box, under the Academics section
- Click 'Grades'
- Click the go button
- Screen will default to Official Grades for the current term
- Click 'Mid-term Grades' tab to view mid-term grades
- Click 'change term' button to switch to a different term
How to view mid-term grades (Students)
General Contact Information
Legal Name Changes
- Log in to HRMS.
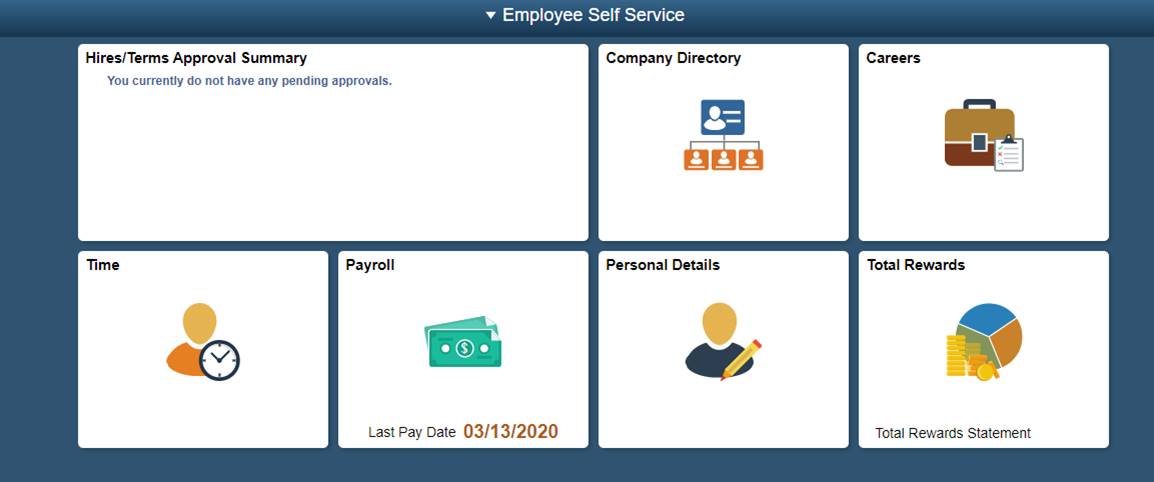
- Click Employee Self-Service.

- Click the Personal Details tile.
- Update your contact details in the Contact Details tab on the left.
Not all holds prevent registering for classes; some service indicators are for information only. Check with the appropriate office for additional information.
Possible holds include:
- Admission – application materials are still required
- Advisor – meeting with your advisor is required
- Customer Accounts Services – your account has a balance that needs to be addressed
- MMR Immunity Verification – proof of immunization is required
- Registrar – contacting the Academic Affairs office is required
A preferred name is the name you’d like to be called, especially if this name is different than your legal name. For example, this could be a nickname or a chosen name that best matches your gender self-identity. DSU students, faculty, and staff can set a preferred first name
Preferred names appear in many of DSU’s electronic systems including:
- Email display name
- Blackboard
- Class Roster/Grade Roster
- Advisement Report
You can update your gender, pronouns, and sexual orientation information in Campus Connection. These are opt-in options and are not required by DSU.
Gender identity is not shared with class instructors or other campus partners, including health services. Authorized campus employees with access to your bio-demographic information will also not have access to view your gender identity.
When you confirmed your enrollment to the campus, some of your personal information, like your name, ID number and demographic information, was made available to campus employees who work with you, including staff, faculty, and some student employees. If you decide to share your personal pronouns, your pronouns will be included along with other information provided to campus employees. Examples of where your personal pronouns will be available include the class roster provided to instructors and staff including your photo and the student record in campus systems that advisors and other student services staff use to work with you.
Sexual orientation is not shared with class instructors or other campus partners, including health services. Authorized campus employees with access to your bio-demographic information will also not have access to your sexual orientation.
